Shop Notes Blog
So what is vacuum resin infusion? Good question. In 2015 I had never heard of it, at least not in relation to flute making. I became familiar with vacuum chambers at the time because I was researching methods for speeding up the drying of wood. Any flute maker will tell you that the acquisition and storage of wood for flute making is a big part of the job. One can buy kiln dried wood, which is very nice, but often the nicest pieces of wood are sourced in such a way that they have never been through any commercial drying process and they need a considerable amount of time to settle and dry before they can be used. With some of those oily, dense tropical hardwoods it can take many years for this to happen naturally.
I had heard of the use of vacuum chambers for speeding up this process. These chambers can pull a fairly powerful vacuum that literally sucks the moisture out of the wood by accelerating the natural drying process. So that what might take months and years of drying can be done in days.
It sounds like magic, but there are downsides to this process. If done on very dense woods that are still quite green it can cause “checking”, which is another word for “cracking”. This is a danger with woods that air dry as well, but highly accelerated drying can exacerbate this. I’ve already had some experience with this phenomena. However, it is a small price to pay for the ability to make flute timbers available sooner rather than later, especially for a maker who is still in the process of building and organizing stock that is meant for use years down the road. So I acquired a vacuum chamber for this purpose, but after using it for some time I’ve come to think that the best use of the vacuum chamber is not for drying wood after all! An oven works better under the right conditions. What I found to be the best use of the chamber is a process called “vacuum resin infusion”.
Any wood artisan can tell you is that wood is not stable. Because it is an organic substance, even when it is dry it will shift, shrink and bend. When it is cut and shaped, inner grain tension is released and it can get pretty mobile. It will also shrink and swell in response to moisture, depending upon how well it is sealed. In essence, it can be a tricky thing to work with, especially when you are making something like a flute, and particularly a flute with joints (tenons). Flute makers who craft these types of instruments have learned how to season wood and how to work it in stages, letting it settle between stages so that this tension can be released along the way. This makes for a more stable finished product.
Despite these precautions, it is common for some types of woods to warp and shrink over time. Many of the woods favored by makers are chosen because of their inherent stability, their resistance to moisture and their workability. There are many woods that are truly beautiful but not really suitable for flute making because they are too soft, too porous, don’t machine well, etc.. Vacuum resin infusion can transform these woods into workable materials, thereby expanding the flute maker’s options.
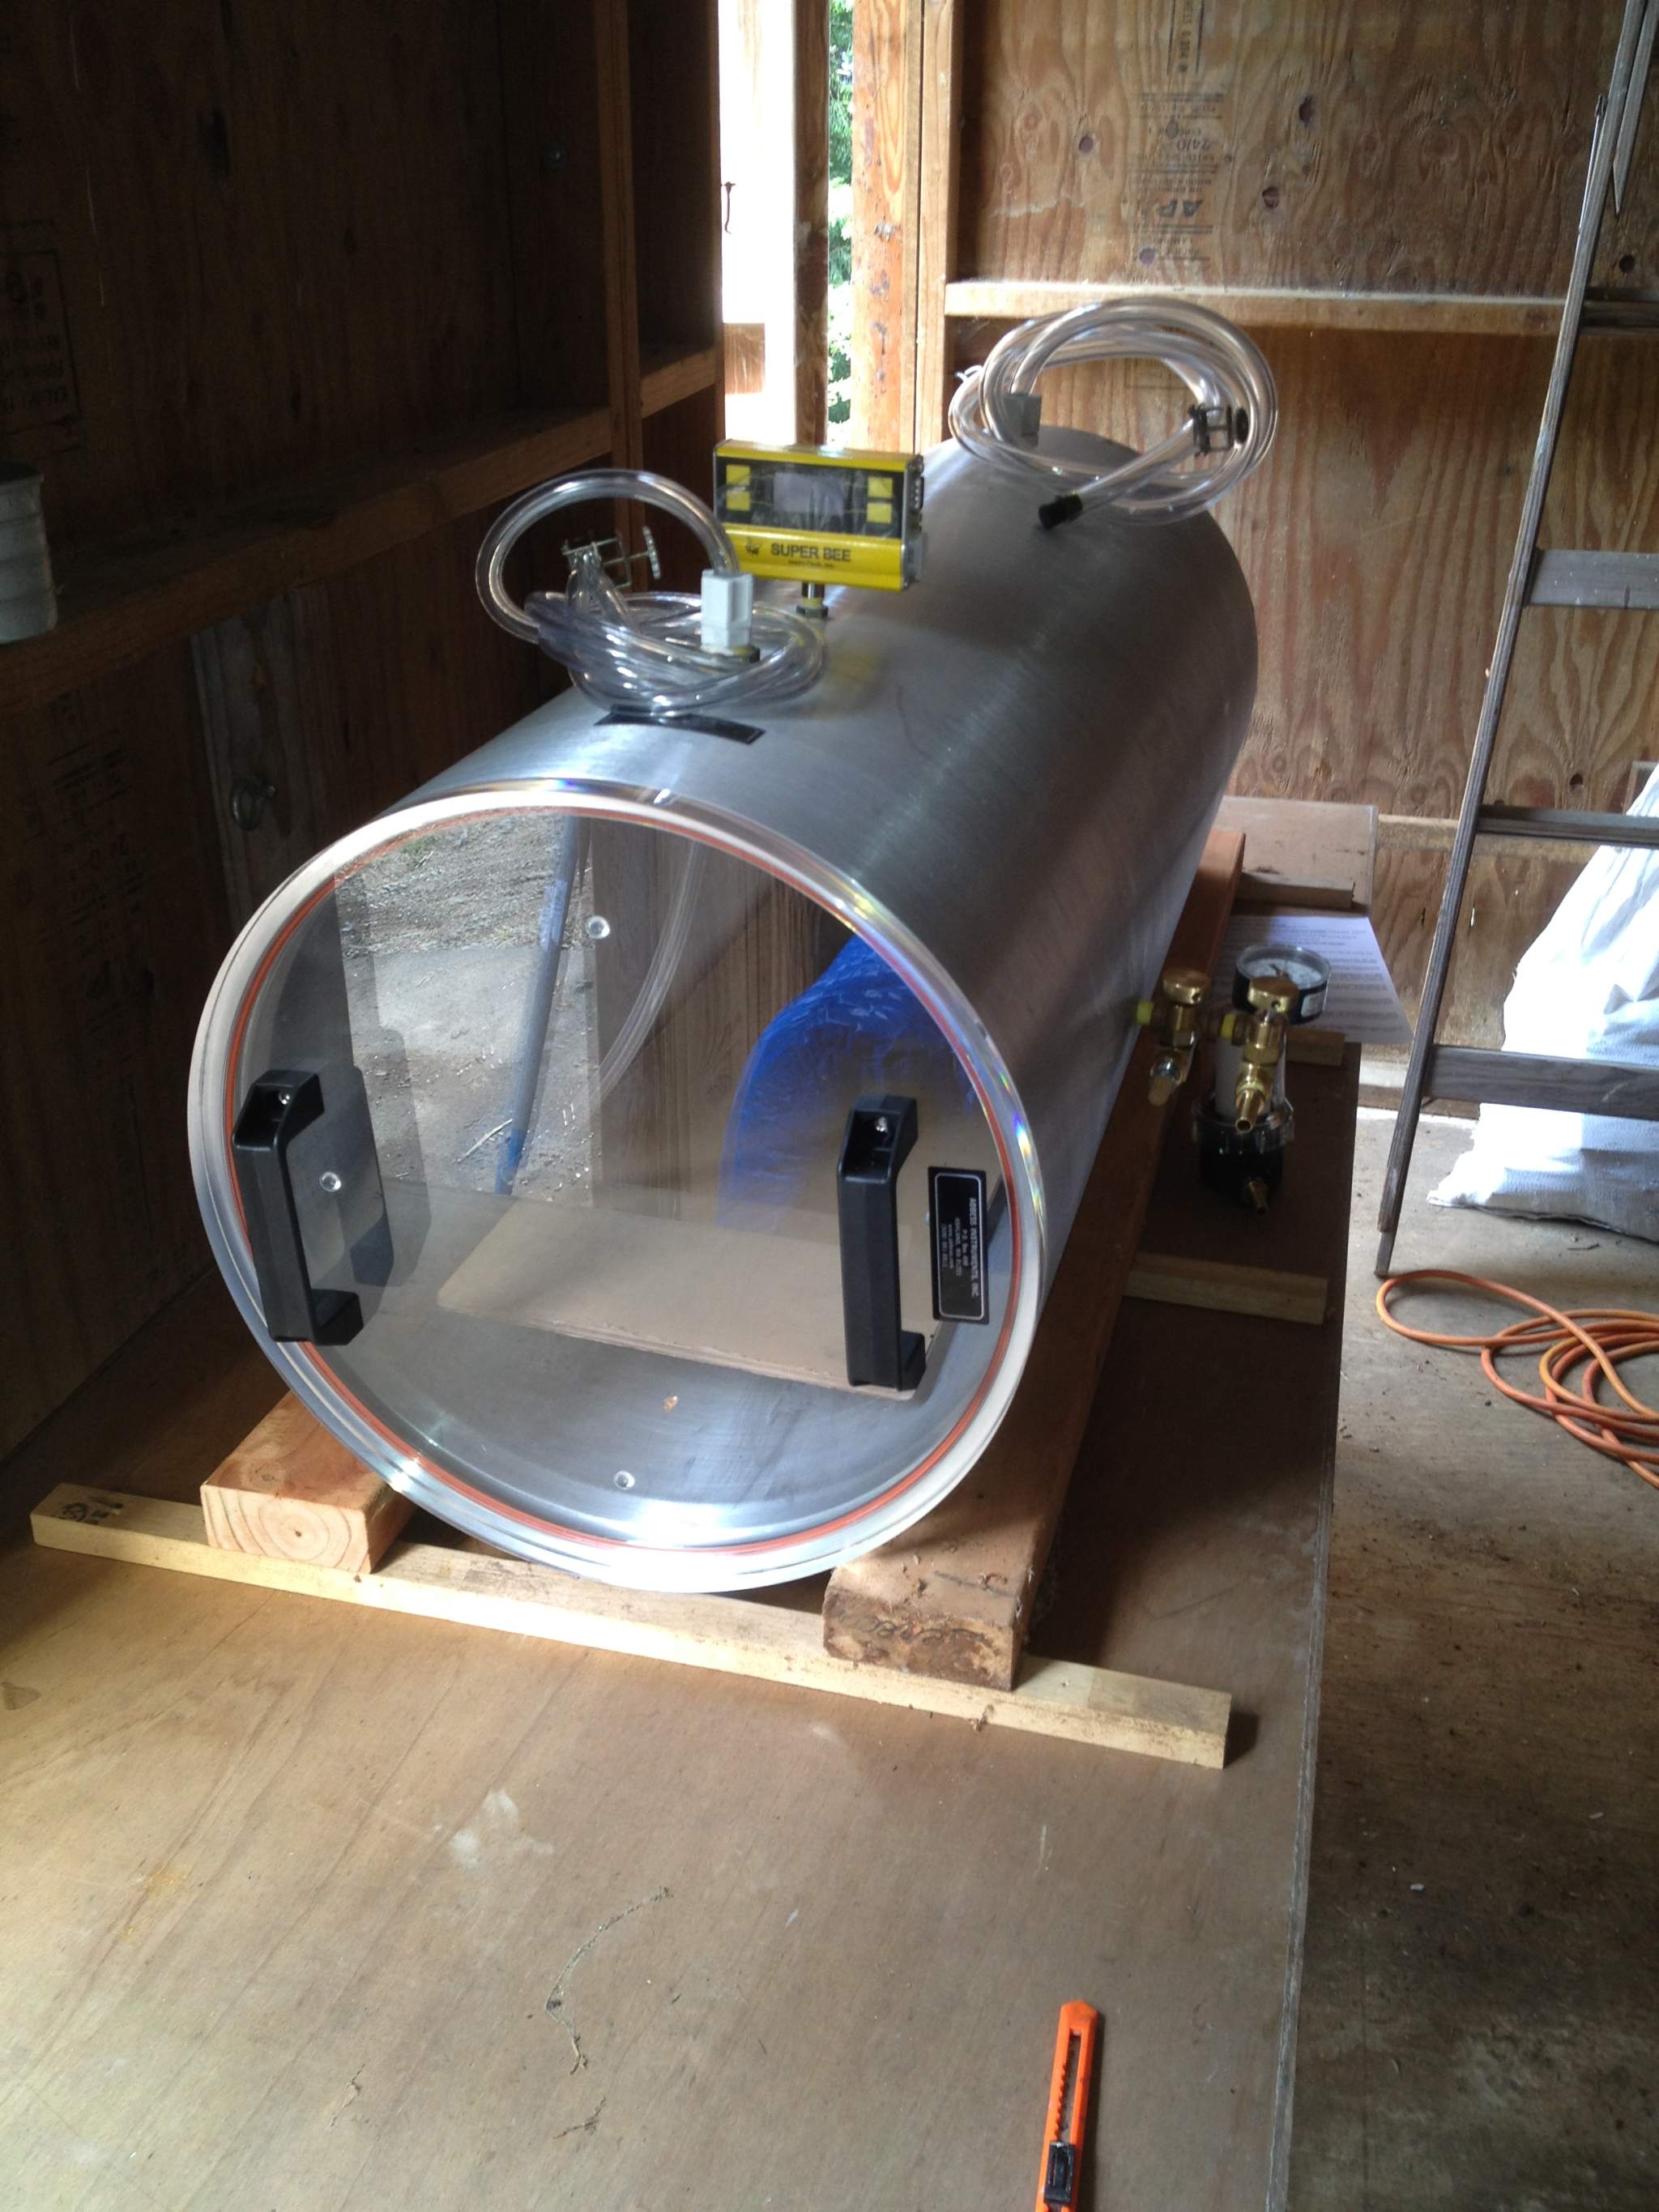
How it works is thus: billets of the wood are turned into cylinders and then placed in a drying oven for 48 hours, where they are baked at 205 degrees. This forces all of the remaining moisture out of the wood. Then they are cooled inside of a plastic bag to prevent moisture re-absorption. When cool, they are placed into a deep metal tray inside of the vacuum chamber and submerged in liquid resin. The chamber is sealed, the pump is activated and a vacuum is pulled, sucking the air out of the pores of the wood. This vacuum is left in place for around 36 to 48 hours.
Most of us have heard the phrase “nature abhors a vacuum”. The billets of wood within the chamber have been forcibly emptied of air and moisture and then submerged in liquid. What happens when the vacuum is released is that they try to fill back up with air. But they can’t because they are submerged, so instead they drink the resin. You’d be surprised how much air space there is inside of a piece of dry wood! As I said before, some woods are not at all suitable for resin infusion due to their density and oil content, but the woods that are suitable will get a significant gain in density, in some cases doubling their density. This takes a wood like maple and makes it as dense as African Blackwood.
I use a type of resin called Cactus Juice (which requires a heat cure) but it has the virtue of being designed to penetrate the wood very effectively.
So the resin has filled the wood, but it is uncured (still liquid). It takes heat to harden the resin, so the wood has to be prepared for the cure oven.
For the resin to cure, it has to be heated to a temperature of 200 degrees for a minimum of an hour. That means that the inside of the billet has to reach this temperature and stay there. If it cools too soon or if the temperature fluctuates too low, the curing process is aborted and cannot be restarted. If that happens, you have to chuck out the billet and start again, so it is very important to get it right.
The curing process requires the wood to be wrapped in aluminum foil to prevent the resin bonding to the oven or whatever else it comes into contact with. So the billets come out of the resin bath, get wrapped nice and snug with aluminum foil, and then placed in the oven.
Once the oven is hot, it usually takes several hours for the cure process to work, providing the temperature is maintained properly. To be extra sure of my cure I usually will let them bake for eight hours. Once cured, the billets are removed and unwrapped and they are now heavier and considerably more stable.
Stability is the magic reward for all of this bother. A piece of wood that has been infused with resin is now going to be highly stable compared to an untreated piece. It won’t shift as much with changes in temperature and humidity and its workability is greatly enhanced, as well as it’s resistance to moisture. Anyone who has worked with highly figured woods or any kind of burl will tell you that it can be tricky, and great care is needed to avoid tear-out (chunks of wood being ripped away unexpectedly). Once the wood has been stabilized, these tendencies are greatly reduced (but not eliminated). It is worth observing that while resin infusion increases wood density dramatically, it does not increase hardness in proportion.
When I was researching the benefits of resin infusion, I kept asking myself why more flute makers weren’t doing it. It seemed like a great solution to all sorts of difficulties, but now I know the answer. I’m delighted that I have this tool at my disposal because it allows me to to utilize many woods that would not, in other circumstances, be ideal. It allows me to make flutes in ways that would be impossible (or ill-advised) without the stabilization process. BUT…
It is rather expensive and it can be messy, plus there is a learning curve for mastering the process. I have had to overcome a number of obstacles and I’ve had to invest more money and more time than I had imagined would be necessary. I suspect that this is part of the reason why few flute makers try it. I wouldn’t be surprised to find out that some other makers have experimented with this, but I also would not be surprised to find out that they gave up. I have to have a small barn dedicated to the operation because there is no way to manage it in a tidy fashion. This might just be me, since I have a friend who does it as well and he manages without making a huge mess :-). In my case, resin will be spilled, pump oil will gush and dribble on the floor from time to time. Also there is a distinct odor during the infusion process, so having this dedicated space is key.
Additionally, the resin is quite expensive and some of the woods absorb a lot of it. I actually think that the price of the resin is very reasonable, but the man who markets it targets craftspeople who are making small items like pen blanks or knife handles. Such an item would use a very modest amount of resin. A nice, porous flute billet that is about 1.5”x1.5”x30” is going to drink up about a pint of the stuff at $90 per gallon! And the equipment itself is costly and the process takes a lot of patience. In addition to all of this, there are not really that many woods that are well suited to the process. Oily tropical woods are completely unsuitable and the vacuum process can actually damage them. Many woods have a grain structure that does not lend itself to absorbing the resin, so the stabilization process only works marginally well. As I mentioned, some soft porous woods absorb resin well, but they do not have the inherent hardness or strength to make them as desireable in certain applications. In the end, the wood that I use the most of is hard maple. Maple is already a hard, strong wood, but it also absorbs resin beautifully. So far it is the undisputed champion. I also use it on woods like black walnut, cherry, boxwood, hawthorne, and curly douglas fir. None of these woods absorb resin like maple does, but even if they only increase their density by 30% to 60%, that is enough when combined with the actual process of baking the wood to render them far more stable.
In truth, I didn’t know what I was getting into when I started this, and even though I can recommend it to other woodworkers, I do so with some qualifications. It is a process and takes some patience. However, now that I have the set up, I’m finding that it brings a whole other dimension to my craft and for my purposes it has proven worthwhile.
Published Friday, October 26, 2018